
Most real apps need a backend: a database, sign-in, and file storage. In FlutterGo, Supabase is your app's backend. You connect your Supabase account once and link a Supabase project to your app. The agent then builds the tables, sign-in, storage, and server functions for you.
Firebase works too. The agent writes the Firebase code, and you add your Firebase config files through a setup form.
There is no separate backend server in FlutterGo. Your app's backend is its Supabase project, and server code runs as Supabase Edge Functions that the agent writes and deploys.
What you need#
- A Supabase account (the free tier is fine), or a Firebase project created in the Firebase console.
- Any FlutterGo plan. Connecting Supabase has no plan requirement.
- The encrypted Secrets Vault is included on the Business plan and above. On other plans, keys are saved as files in your project instead. Either way they are never pushed to GitHub.
Supabase, step by step#
Step 1: Connect your Supabase account#
- Open Settings from the account menu at the bottom of the sidebar, and choose Supabase ("Sign in to use your own database, auth, and storage.").
- Click Connect Supabase. Supabase opens in a new tab. Sign in there and approve FlutterGo.
- The tab ends on a Supabase connected page. Click Close window.
- Back in Settings, the card shows Connected and your Supabase organizations.
You connect once, and the connection works for all your projects. To remove it later, click Disconnect on the same card. The keys already saved in your apps stay.
Tip: If you approve on a device where you're not signed in to FlutterGo, for example your phone, Supabase first asks "Connect Supabase to FlutterGo?". Click Connect.
Step 2: Link a Supabase project to your app#
- Open your project and click the gear at the right end of the top bar (tooltip Supabase console). If the top bar is folded away, click Show toolbar first.
- Under Setup, choose Supabase setup.
- Pick a project from the Project list and click Use for this app.
FlutterGo saves the project's URL and publishable key into your app, turns on email and password sign-in, and hands over to the agent: "{name} is now this app's Supabase. The agent is wiring it in and creating the tables."
To use another project later, click Switch project.
No Supabase project yet? You have three options:
- Ask the agent to create one. It shows a Create a Supabase project card. Click Create Supabase project: it takes about a minute, then the card says the project was created and wired in, and the agent carries on.
- Tick "Let the agent create a Supabase project when an app needs one (it can count against your Supabase plan)" in the Supabase setup pane. The agent then creates one by itself when your app needs it.
- When you create a new app on Home, choose Supabase under Where should data live?. FlutterGo creates a project named after your app.
Important: A new Supabase project counts against your Supabase plan. Supabase allows only a limited number of active free projects.
Step 3: Ask the agent to build your backend#
Go back to the chat and describe what you want, for example:
- "Add sign-in with email and password."
- "Save each user's notes in Supabase so they see them on every device."
- "Let users upload a profile photo."
With your Supabase account connected, the agent does the backend work itself:
- it creates tables and the security rules that decide who may read and change each row;
- it sets up sign-in;
- it creates storage for files;
- it writes and deploys server functions (Supabase Edge Functions), for example for payments.
You don't need to open the Supabase dashboard.
Step 4: See your backend in the console#
The Supabase setup pane in the project console has these tabs:
| Tab | What you find there |
|---|---|
| Overview | The project's details, its services, and Resume project if Supabase paused it. |
| Keys | The API keys, each marked "Safe to ship" or "Server only". |
| Data | Your tables, their security rules, and a read-only query box. |
| Sign-in | Redirect URLs, sign-in methods, and Social sign-in. |
| Files | Your storage buckets. |
| Functions | Edge Functions, and Secrets for keys that only server code may use. |
| Security | Problems Supabase found, each with Ask the agent to fix this. |
Open in Supabase opens the same project in the Supabase dashboard.
Social sign-in (Google, Apple, and others)#
Ask the agent, for example "add Sign in with Apple". It shows an Open sign-in setup button. That opens Sign-in → Social sign-in with the provider's row expanded:
- Follow the numbered steps in the row. Copy the Callback URL into the provider's own console.
- Fill in the fields the row asks for. For Apple, FlutterGo can make the secret from your .p8 key in your browser: use Generate secret.
- Switch on Enabled and click the provider's save button, for example Save Apple.
The values go straight to your Supabase project. Never paste client IDs or secrets into the chat.
Paste keys instead of connecting#
If you'd rather not connect your Supabase account, open Supabase setup in the project console and expand Paste a project URL and key instead:
- Project URL: "In Supabase: Project Settings → API."
- Publishable key: "In Supabase: Project Settings → API keys (publishable / anon)."
- Click Continue.
The agent wires those keys into your app, but it cannot see or change your Supabase project. Connect your account (Step 1) to let it build tables and sign-in for you.
Important: Only the publishable key belongs in your app. Never put the service-role (secret) key in the app. The agent keeps server-only keys for server code.
Firebase, step by step#
Step 1: Ask the agent to set up Firebase#
Open your project and describe what you want, for example: "Set up Firebase for this app: add Firebase Core and email/password authentication with login and sign-up screens, and gate the app behind sign-in." The agent adds the Firebase packages, the login and sign-up screens, and the sign-in logic. When it needs your config files, it shows an Open Firebase setup button.
Step 2: Create a project in the Firebase console#
Go to console.firebase.google.com, click Create a new Firebase project, give it a name, and click through. You can switch Gemini and Google Analytics off for a lean demo project. After about 30 seconds you land on the project overview.
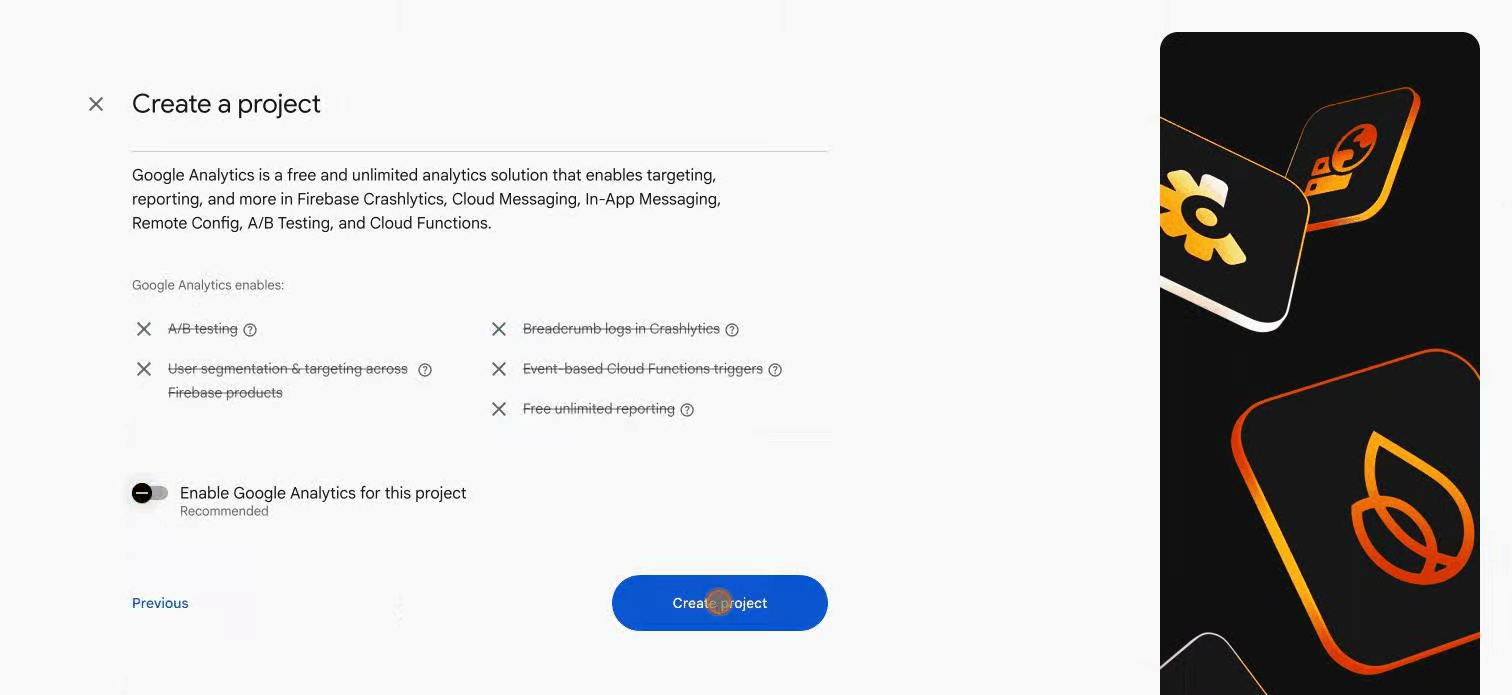
Name it, skip the extras, create: Firebase sets up the project in under a minute.
Step 3: Register your Web, Android, and iOS apps#
In Project settings → Your apps, click Add app and register each platform:
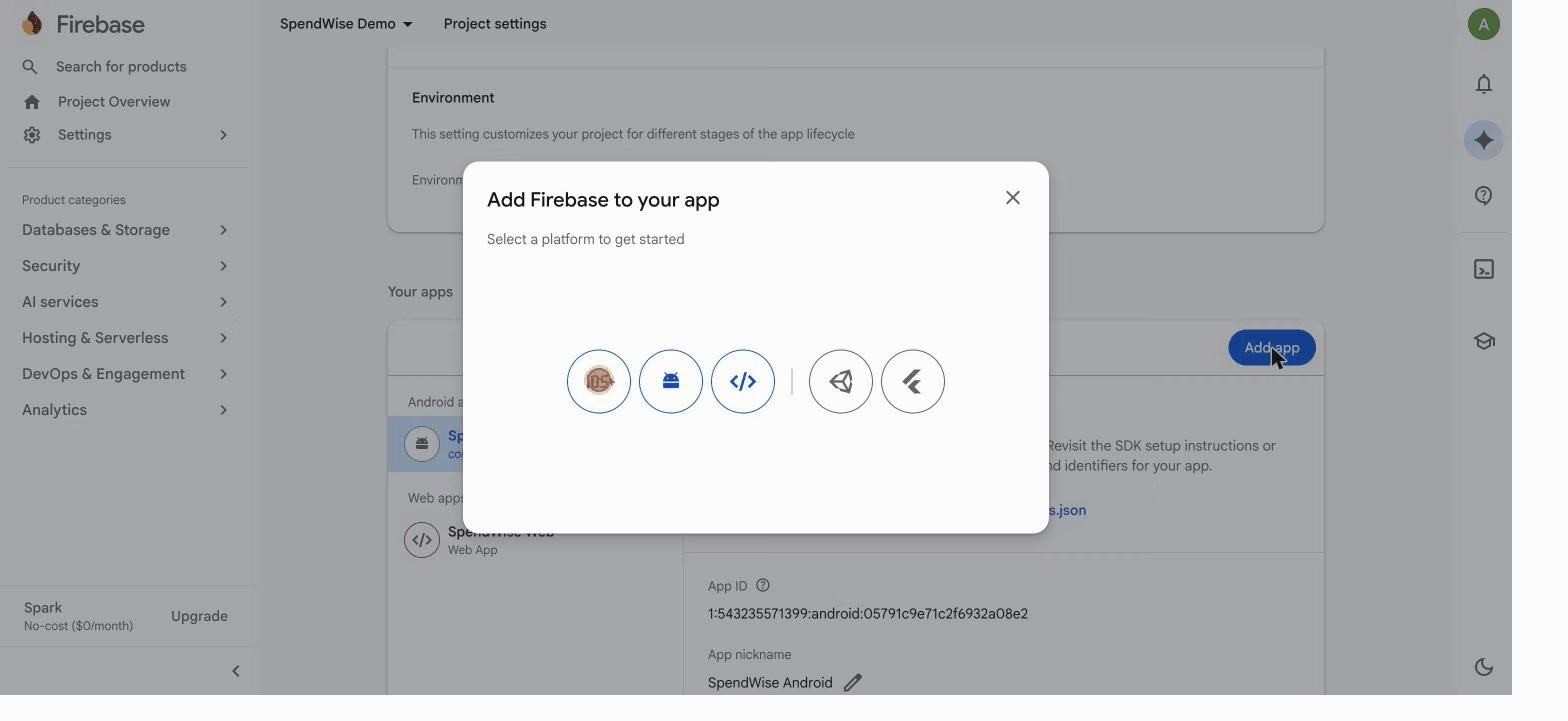
One Firebase project holds all three apps: Web (\</\>), Android, and Apple.
- Web: give it a nickname and copy the SDK setup config (the
firebaseConfigblock). - Android: enter your app's Android package name, then Download google-services.json.
- iOS (Apple): enter your app's iOS bundle ID, then Download GoogleService-Info.plist.
You'll find your app's Android package name and iOS bundle ID in the project console → App identity.
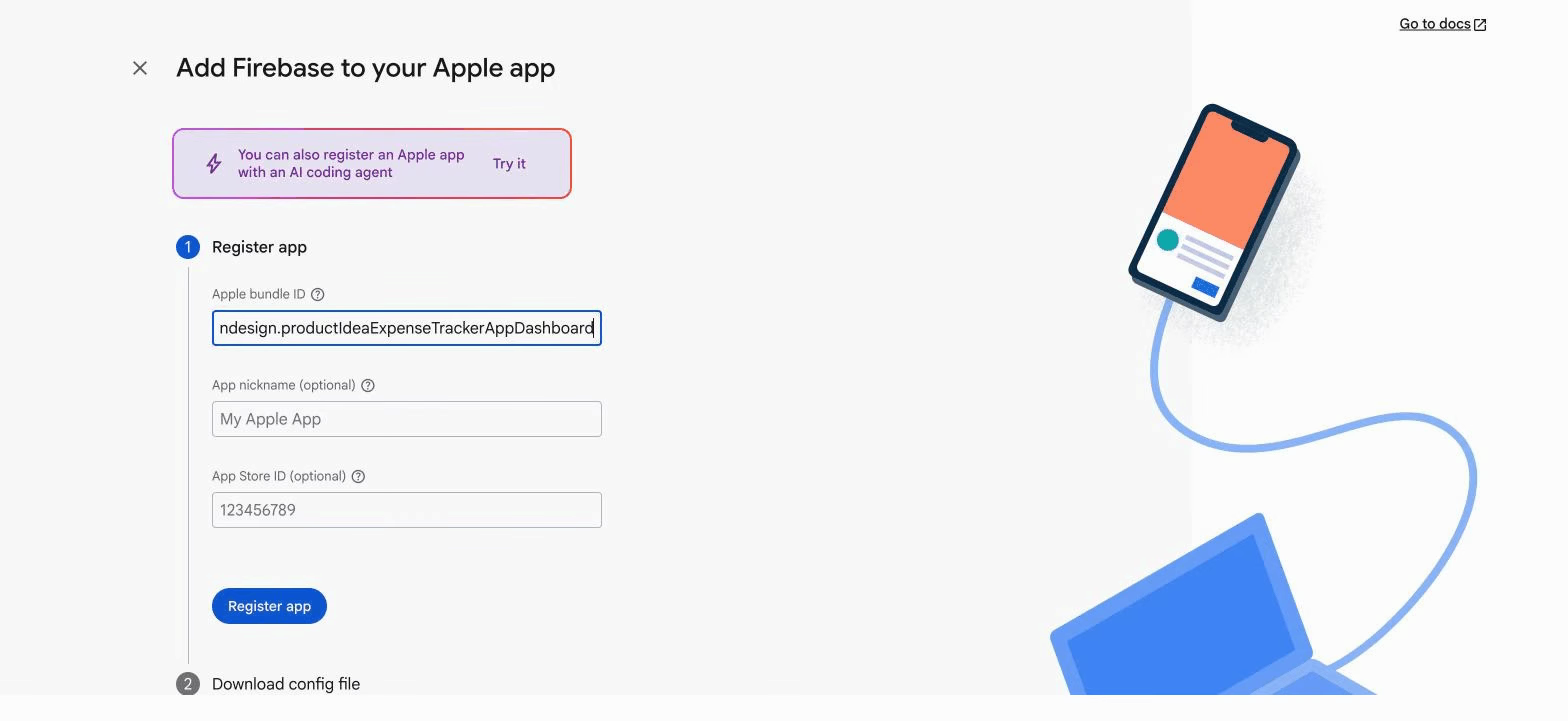
Each platform wizard ends with its config file download. You'll add all three in FlutterGo.
Step 4: Enable Email/Password sign-in#
Open Authentication → Get started → Sign-in method, choose Email/Password, switch on Enable, and Save. Without this step, every sign-in attempt fails with operation-not-allowed.
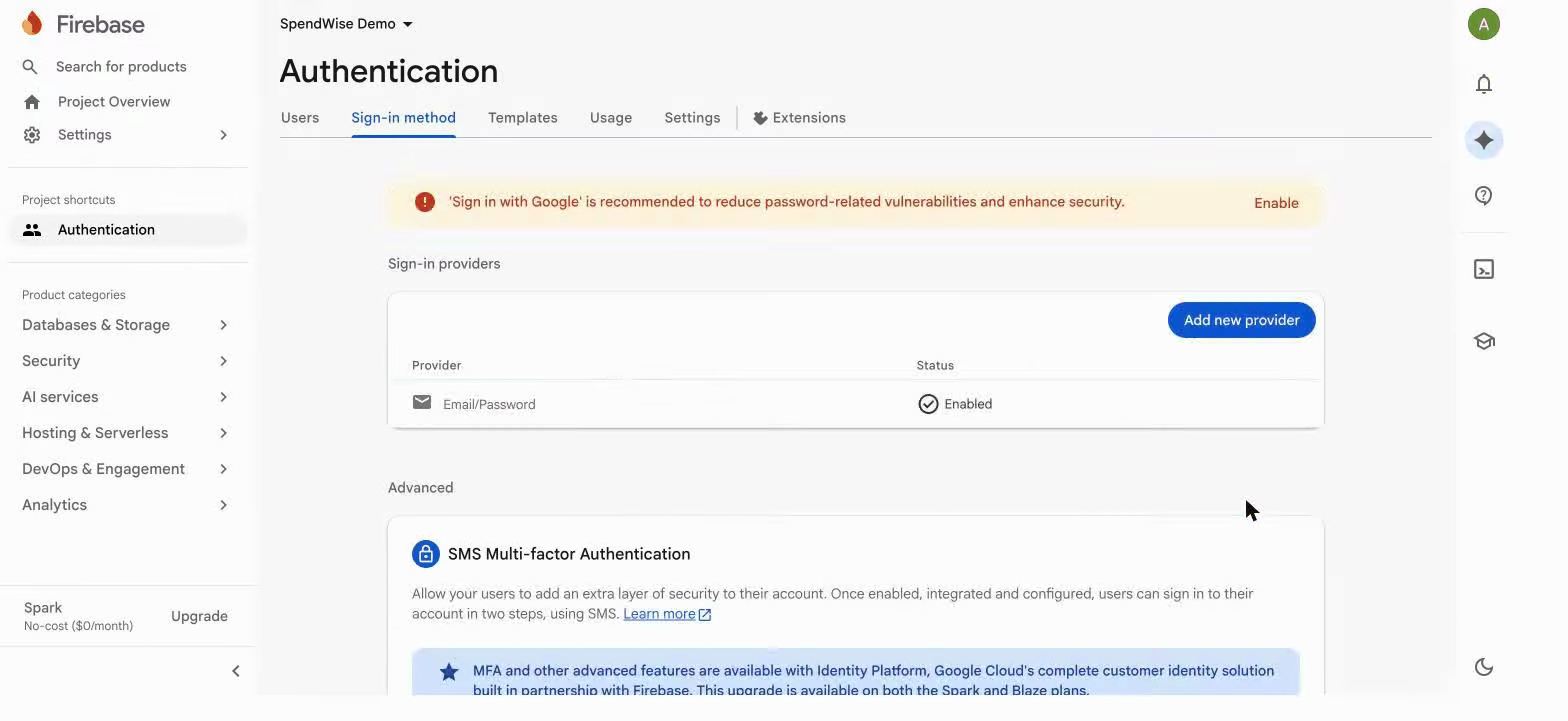
The provider list confirms: Email/Password is enabled.
Step 5: Add the config files in FlutterGo#
Click Open Firebase setup in the chat, or open the gear in the top bar and choose Firebase setup under Setup. The form ("Config files from your Firebase console, written into the project when you continue.") has three fields:
- Android — google-services.json: "In Firebase: Project settings → Your apps → Android."
- iOS — GoogleService-Info.plist: "In Firebase: Project settings → Your apps → iOS."
- Web — Firebase config JSON: "In Firebase: Project settings → Your apps → Web." Attach the file, or paste the config in Or paste SDK setup JSON.
Use Attach file for each file, then click Continue. FlutterGo writes the files into your project and posts a message in the chat so the agent can finish the wiring.
Step 6: Rebuild and create a real account#
Click Rebuild in the right panel (it reads Run app if the app hasn't run yet). The app now opens on the login screen the agent built. Click Sign Up, enter an email and password, and press Create Account. This is a live call to Firebase.

The login screen the agent generated: email, password, and a Sign Up link.
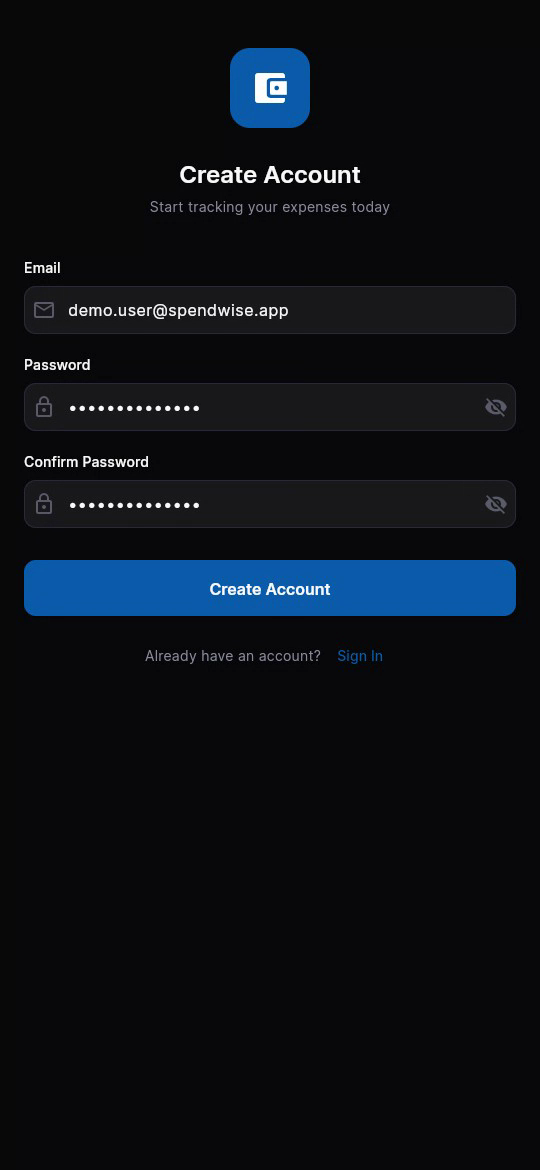
A real account about to be created in your Firebase project.
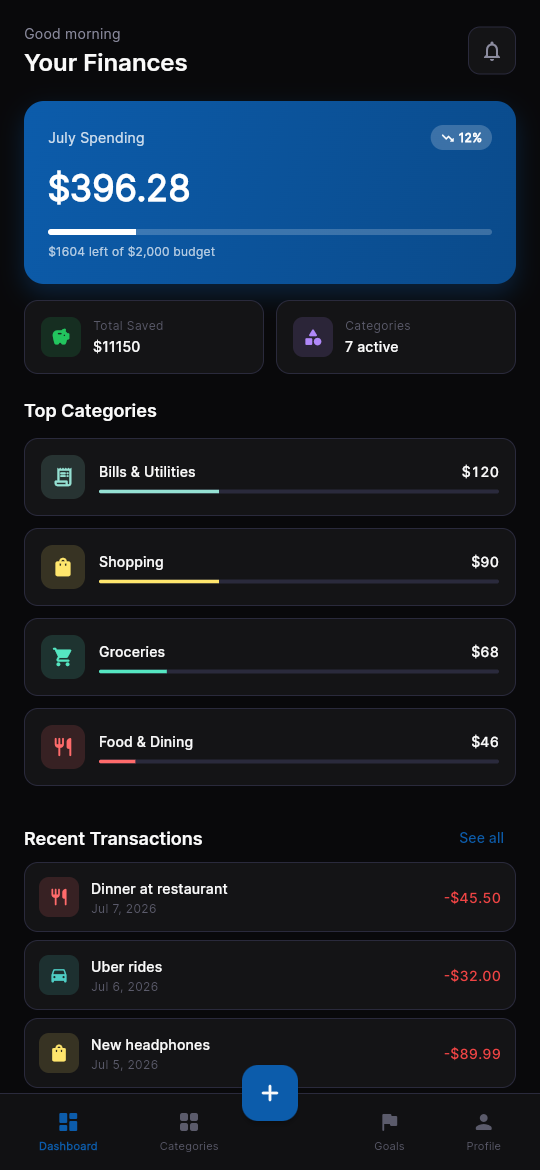
Sign-up succeeds and the app opens. Everything now sits behind sign-in.
Step 7: See the user in Firebase#
In the Firebase console, open Authentication → Users and refresh: your new user is there, with provider, creation date, and UID.
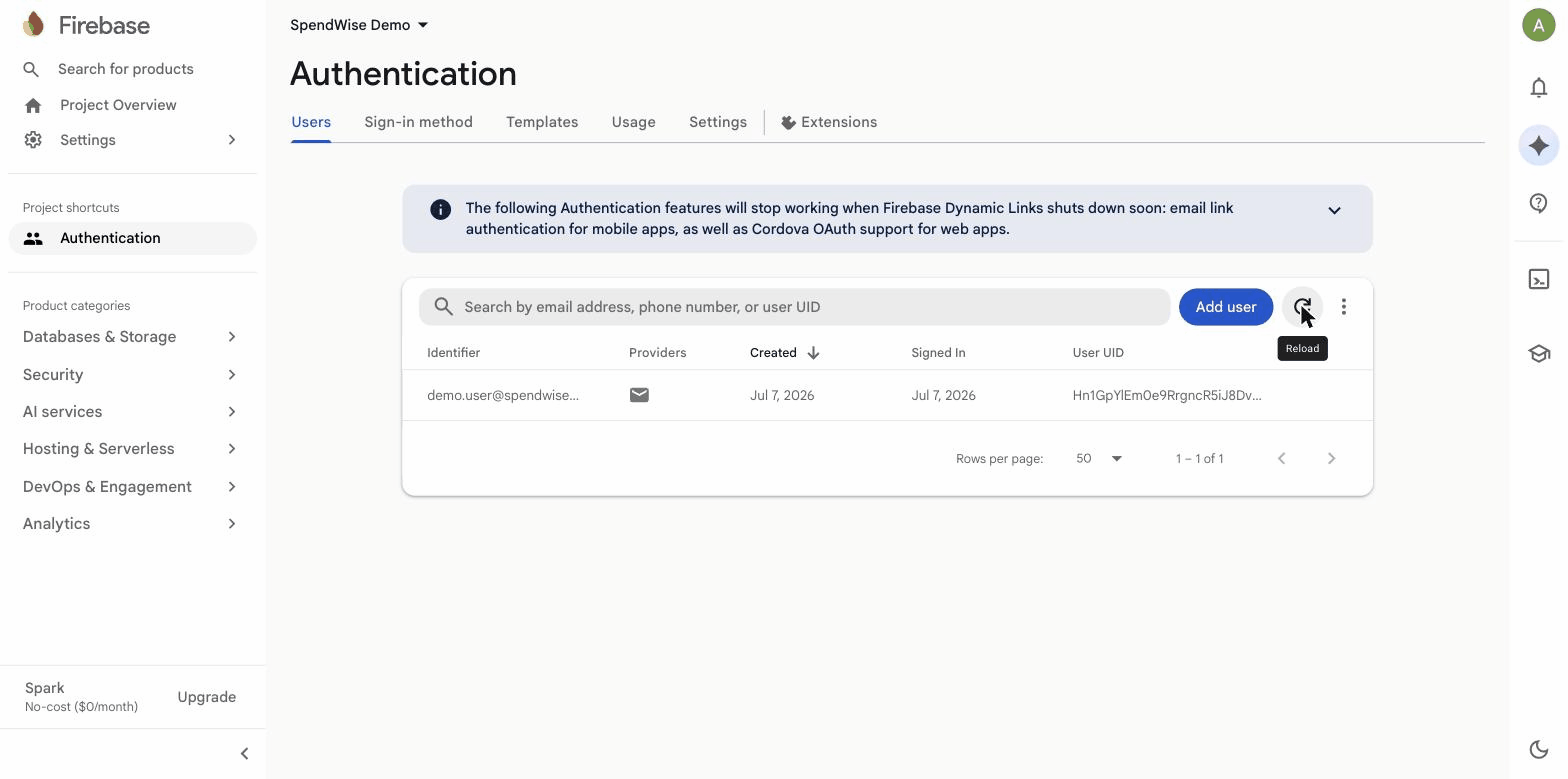
Proof of the full loop: the account created inside your app, recorded by Firebase.
Success: Your app now has working Firebase sign-in on Web, Android, and iOS, from one prompt, one console session, and three config files.
Other setup forms#
The project console's Setup list holds a form for every service your app uses. A form appears when the agent adds that service, and the agent opens the right one with a button such as Open Stripe setup.
| Form | What it asks for |
|---|---|
| App identity | Your app's display name, icon, Android package name, and iOS bundle ID. |
| Firebase setup | The three Firebase config files (above). |
| Supabase setup | Your Supabase project (above). |
| Stripe setup | "Your Stripe API keys. The publishable key goes in the app; the secret key never does." Fields: Publishable key and Secret key. |
| Database setup | DATABASE_URL, a database connection string kept for server code only. |
| Branch.io setup | Branch live key, Branch test key (optional), and Link domains (optional). |
The agent can also add a form for any other service your app needs.
Each form shows which fields are Ready and which are still Needed. Fill in what you have, then click Continue: the values are saved to your project, and a message in the chat hands the wiring back to the agent.
Where your keys are saved#
- Business and Enterprise: in the encrypted Secrets Vault. FlutterGo copies them into the project automatically when it opens.
- Other plans: as files in your project. Keys the app may use go in
.env. Server-only keys, such as a Stripe secret key or a database URL, go in.env.server, which your app never loads. The forms say so: "Saved as plain files in your project. Upgrade to Business for encrypted Secrets Vault storage."
On every plan, .env files, google-services.json, GoogleService-Info.plist, and signing files (keystores, .p12) are never pushed to GitHub and are left out of Download code.
Manage the Secrets Vault (Business and above)#
Open Settings → App repo & secrets ("GitHub for sync and deploys, plus your app's secrets."). Below the GitHub card:
- Under Project, pick the app: "Secrets are stored per project. Pick which app to manage."
- Under Secrets vault, choose a common secret from Quick add by platform ("Choose a common secret…"), or add your own: pick File or Env var, fill in where it goes and its value, add an optional label, and click Add secret.
- Each secret shows who added it, You or Agent. Click Remove to delete one.
- Materialize into working tree now writes the secrets into the project right away. This also happens automatically when the project opens.
A secret can be up to 5 MB. Below Business, this page shows "Secrets Vault is included on Business and above" with Upgrade to Business and Compare plans.
Keys in the chat#
Don't paste keys into the chat. Use the setup forms instead.
If you paste one anyway, FlutterGo recognises common keys, such as Stripe and OpenAI keys or a database address with a password. It saves them to your project before the message is sent, and the chat shows a note such as "[Stripe secret key, saved]" in place of the key. Keys it does not recognise, including Supabase's newer sb_publishable_ and sb_secret_ keys, stay in the message as typed. Use the setup form for those.
What goes where?#
| Item | Where it lives | Pushed to GitHub or in Download code? |
|---|---|---|
| Supabase Project URL and publishable key | Your app's .env (the vault on Business) | Never |
Server-only keys (Stripe secret key, DATABASE_URL) | .env.server (the vault on Business) | Never |
| Secrets for Edge Functions | Supabase console → Functions → Secrets | Never (they live in Supabase) |
google-services.json, GoogleService-Info.plist | Your project (the vault on Business) | Never |
| Firebase web config JSON | Your project | Yes (it holds no secrets) |
Upload keystores and .p12 certificates | Saved by FlutterGo | Never |
| Your app's code | Your project, and your GitHub repository when you push | Yes |
Troubleshooting#
Problem: Connect Supabase opens nothing, or never finishes. Possible causes: The browser blocked the new tab, or the tab was closed early. Solution:
- Allow pop-ups for fluttergo.ai.
- Click Connect Supabase again and finish approving in the Supabase tab.
- If Supabase says "This authorization link expired or was already used. Click Connect again.", do exactly that.
Problem: Supabase setup says "No projects found in your Supabase account." Possible causes: Your Supabase account has no projects yet. Solution: Ask the agent to create one (Create Supabase project), or create one with Open in Supabase, then pick it and click Use for this app.
Problem: Creating a Supabase project fails because of a project limit. Possible causes: Your Supabase account has reached its limit of active free projects. Solution: In Supabase, pause or delete a project you no longer use, or upgrade your Supabase organization, then try again.
Problem: The app builds, but Firebase or Supabase calls fail when it runs. Possible causes: A missing config file, a wrong key, or a missing platform setting. Solution:
- Open the gear → Setup and check that the form shows every field as Ready.
- On Business, open Settings → App repo & secrets and click Materialize into working tree now.
- For Supabase, check the Security tab in the console.
- Describe the error in the chat. The agent repairs configuration problems too.
Problem: I saved a wrong value. Possible causes: A typo or the wrong file. Solution: Open the same setup form, replace the value or use Replace file, and click Continue. On Business you can also Remove the secret in the vault and add it again.
FAQ#
Do my keys end up on GitHub? No. On every plan, .env files, the Firebase Android and iOS config files, and signing files are never pushed to GitHub or included in Download code. On Business they are also encrypted in the Secrets Vault.
Which backend should I pick? Supabase is built in: connect it once, and the agent creates and runs your database, sign-in, storage, and server functions. Firebase works through its config files, and you set it up in the Firebase console yourself.
Can my app have its own backend server? Not as a separate server. Your app's backend is its Supabase project, and server code runs as Supabase Edge Functions, which the agent writes and deploys for you.
Does connecting Supabase cost anything in FlutterGo? No. Any plan can connect Supabase. Supabase's own plan limits still apply to your projects there.
Can the agent add secrets by itself? Yes. On Business, keys and files the agent saves appear in the vault tagged Agent.
Is the Secrets Vault free? It's included on Business and above. On other plans keys are saved as files in your project, still kept out of GitHub.
Can I store any file, not just backend configs? On Business, yes: the vault takes any file up to 5 MB, or an env var, such as certificates, .pem keys, .env files, or custom API keys.