
After you sign in, FlutterGo opens on Home. Everything starts here: you describe your app, choose what to build, and click Start building.
Home has two parts. In the center is the composer, the box where you describe your app, with import tiles under it. On the left is the sidebar: your projects, the help links, your credits, the Help button and, at the very bottom, your account menu with Settings. Inside a project, the studio adds a top bar above the app preview.
You don't need to learn many buttons. If you can describe your app in a sentence, you can start a project. Here we walk through every visible control so you always know what you're clicking.
Watch it first: the opening step of Build your first app, describing an app on Home.
Home: the sidebar on the left, and the composer with the Mobile app and Website tags, Start building, and the import tiles.
The dashboard at a glance
| Area | Where | What it does |
|---|---|---|
| Composer | Center | Describe your app, choose Mobile app or Website, and click Start building. |
| Import tiles | Under the composer | Start from Figma, Files, Photos, a ZIP, GitHub or a Website. |
| Recently edited | Below the tiles | Your latest projects, with View all. |
| Sidebar | Left edge | Home, Projects, Starred, Recently viewed, Shared with you, Plans & pricing, Help Center, Release notes and Status. |
| Credits, Help and account | Bottom of the sidebar | Your credits left, the ? Help button, and your account menu: Settings, Plans & billing, Log out. |
| Studio top bar | Inside a project, above the preview | Module tabs, Share, Publish, Add to project, the gear and Hide toolbar. |
What you need#
- You are signed in (see Creating your account & signing in), and your email address is confirmed: creating and running projects needs it.
- At least 1 credit. The Free plan gives you 5 credits on day one, then 3 a day for your first week, then 5 a month, and up to 2 projects.
How to do it#
1. Get to know Home#
Home greets you with "The AI Flutter app builder that ships to both stores." Below it is the composer, and under the composer the import tiles.
2. Describe your app#
Click the composer and describe your app: the screens, the features, and how it should feel. One or two sentences are enough, for example "Recipe Box: a recipe app with search, favorites and a step-by-step cooking mode." Press Enter to send, or Shift+Enter for a new line.
3. Choose Mobile app or Website#
Two tags at the bottom of the composer choose what to build:
- Mobile app (selected by default): a Flutter app for Android and iOS.
- Website: a website. The box then asks you to describe the website. See Building a website.
See Creating a project for what each one gives you on your plan.
Tip: The Website tile under the composer is something else. It starts a prompt that rebuilds an existing website as a Flutter app: paste the site's address after it.
4. Add files or context (optional)#
Click + in the composer to attach files, a Figma link or connectors. On Home, + can also import a Flutter app as a ZIP (Import Android & iOS app) or clone one (Clone from GitHub). The tiles under the composer do the same in one click. See Importing an existing app.
5. Click Start building#
Click Start building, or press Enter. FlutterGo creates the project and opens the studio. For a mobile app it may first ask Where should data live?: choose Supabase or Skip for now, then click Open workspace.
On your first project on the Free plan, a line under the composer says: "Your first app build uses 1 credit. Finishing it and fixing a failed build are free."
6. Find your way with the sidebar#
The sidebar is on the left of every screen outside a project:
- Home: the composer.
- Projects: all your projects. Search… finds one, and each card's menu has Star, Rename and Delete.
- Starred: the projects you starred.
- Recently viewed: the projects you opened, newest first.
- Shared with you: projects other people invited you to.
- Plans & pricing: the plans and credit packs.
- Help Center (this documentation), Release notes and Status: these open in a new tab.
At the top, the panel button beside the FlutterGo logo hides the sidebar (Collapse sidebar); click the logo to bring it back (Expand sidebar). Under the logo, Search finds a project by name ("Find a project…"), and ⌘K (or Ctrl+K) opens it from anywhere. On a phone the sidebar is a menu: tap the panel button at the top left (Open menu).
7. Check your credits#
Near the bottom of the sidebar, a card shows your credits, for example 5 credits left. Click it to see the plans, or Buy more when you are low. On the Free and Starter plans the card can also suggest Upgrade to Pro, with See plans; Hide for now hides that suggestion for three days.
8. Open your account menu#
Your account is at the very bottom of the sidebar: your picture or initials, your email and your plan. Click it to open the menu:
- Settings: your account and preferences. See Settings & account management.
- Plans & billing: plans, credit packs and billing. See Plans, credits & billing.
- Log out.
9. Get help#
The ? button beside your account opens Need help?, with two tabs:
- Message us: Message WhatsApp or Email support reaches a person at FlutterGo.
- Guides: the documentation, feature requests and what's new.
Inside a project, the same Help sits in the dock beside the phone. You can also visit fluttergo.ai/support.
10. Get to know the studio's top bar#
When a project is open, the top bar runs across the top, above the app preview.
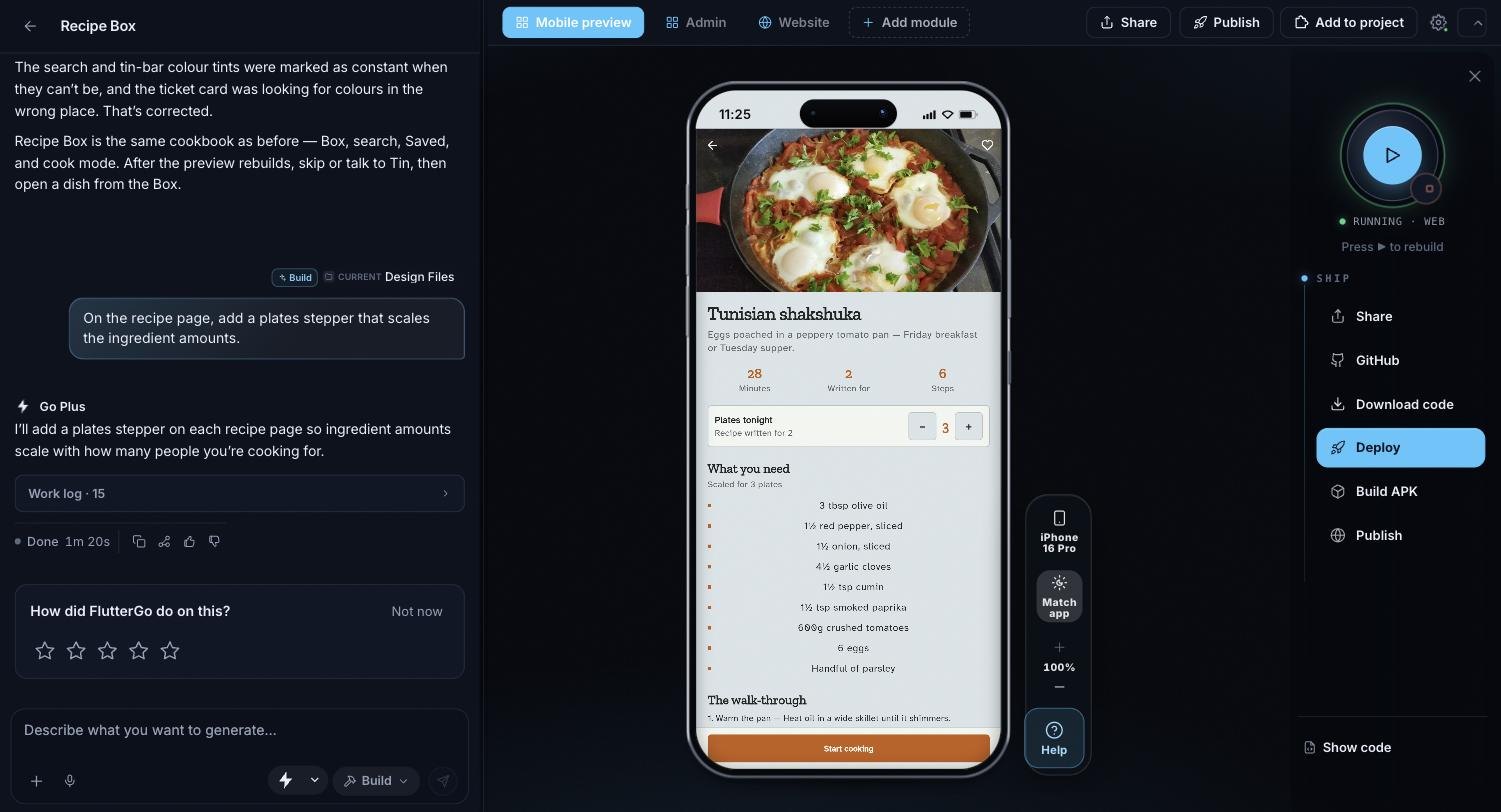
The top bar, left to right: Mobile preview, Admin, Website and Add module, then Share, Publish, Add to project, the gear and the Hide toolbar arrow.
| Control | What it does |
|---|---|
| Mobile preview | Your Flutter app in the phone preview. |
| Admin, Website | Web modules for the same app: an admin panel and a website. They need the Pro plan; below Pro their tabs carry a Pro tag. |
| Add module | Adds a landing page. It doesn't need Pro. |
| Share | The current tab's public preview link, with Copy link and Open in a new tab. |
| Publish (or Connect Vercel) | Puts the web version on your own Vercel account. Pro and up, project owner only. See Web deployment. This is not Publish under Ship, which lists your app in the Explore gallery. |
| Add to project | Opens Add component: ready-made kits of screens and packages to add to your app. |
| The gear (tooltip Supabase console) | The project console: Ship progress, with App identity and the setup forms, and your app's Supabase: keys, data, sign-in, files, functions and security. See Backends: Supabase, Firebase & secrets. |
| Hide toolbar (the arrow at the far right) | Folds the top bar into a small Show toolbar tab. Click Show toolbar to bring it back. |
On a phone, the top bar isn't shown. To leave a project, click the arrow at the top of the chat (Back to projects).
Tip: The rest of the studio, the phone preview and the right panel with Run, Analysis and Ship, is covered in Preview, run & build.
Success: You can now start a project, find your old ones, get help, and reach Settings, all from the sidebar.
Plan mode vs. Build mode (the switch in the studio's chat)
| Plan | Build | |
|---|---|---|
| What it does | "Think the app through with FlutterGo AI without changing any code: screens, user flows, data, and packages." | "FlutterGo AI writes and edits your Flutter app: screens, widgets, navigation, state, and backend wiring." |
| Best for | Scoping a feature, comparing approaches, understanding a build error | Turning an idea into working screens, adding features, fixing bugs |
New chats start in Build. See Working with the AI agent.
Troubleshooting#
Problem: Start building does nothing.
Possible causes: The composer is empty.
Solution:
- Hover the button. If the tooltip says "Type something to run", the box is empty.
- Describe your app.
- Press Enter or click Start building.
Problem: Home says "Building is on hold until the address is confirmed."
Possible causes: Your email address isn't confirmed yet.
Solution:
- Open the confirmation email from FlutterGo and click its link.
- No email? Check your spam folder, then click Resend link in the Verify your email banner.
Problem: "Your plan includes 2 projects and you have 2."
Possible causes: The Free plan allows 2 projects of your own. Projects other people shared with you don't count.
Solution:
- Open Projects, click a project's menu and choose Delete to free a slot.
- Or upgrade: paid plans have no project limit.
Problem: "Could not create the project. Sign in and try again."
Possible causes: Your session ended.
Solution:
- Refresh the page.
- Sign in again and click Start building once more.
Problem: I cannot see the sidebar.
Possible causes: The sidebar is collapsed, or you are on a phone.
Solution:
- Click the FlutterGo logo at the top left (Expand sidebar).
- On a phone, tap the panel button at the top left (Open menu).
- Inside a project there is no sidebar: click Back to projects at the top of the chat.
FAQ#
Do I have to choose Mobile app or Website? No. Mobile app is selected already. Pick Website only if you want to build a website.
What is the difference between Enter and Shift+Enter? Enter sends your description. Shift+Enter adds a new line.
Where do my projects live? Click Projects in the sidebar, or View all next to Recently edited on Home.
Where is the settings gear? Settings is in your account menu at the bottom of the sidebar. The gear in a project's top bar opens that project's console, not your account settings.
Can I switch to a light theme or another language? No. FlutterGo has one dark look and is in English, so there is no Appearance or Language setting.
How do I start a new project? Go to Home, describe the app, and click Start building.
Where do I report a bug or ask for a feature? Open Help (the ? at the bottom of the sidebar). Message us reaches FlutterGo support on WhatsApp or by email.