
This page follows one real build from start to finish: Recipe Box, a recipe app with search, favorites and a step-by-step cooking mode. The prompt, the agent's plan, the error fixes and the running app in the videos all come from the same session. Each step has a short video.
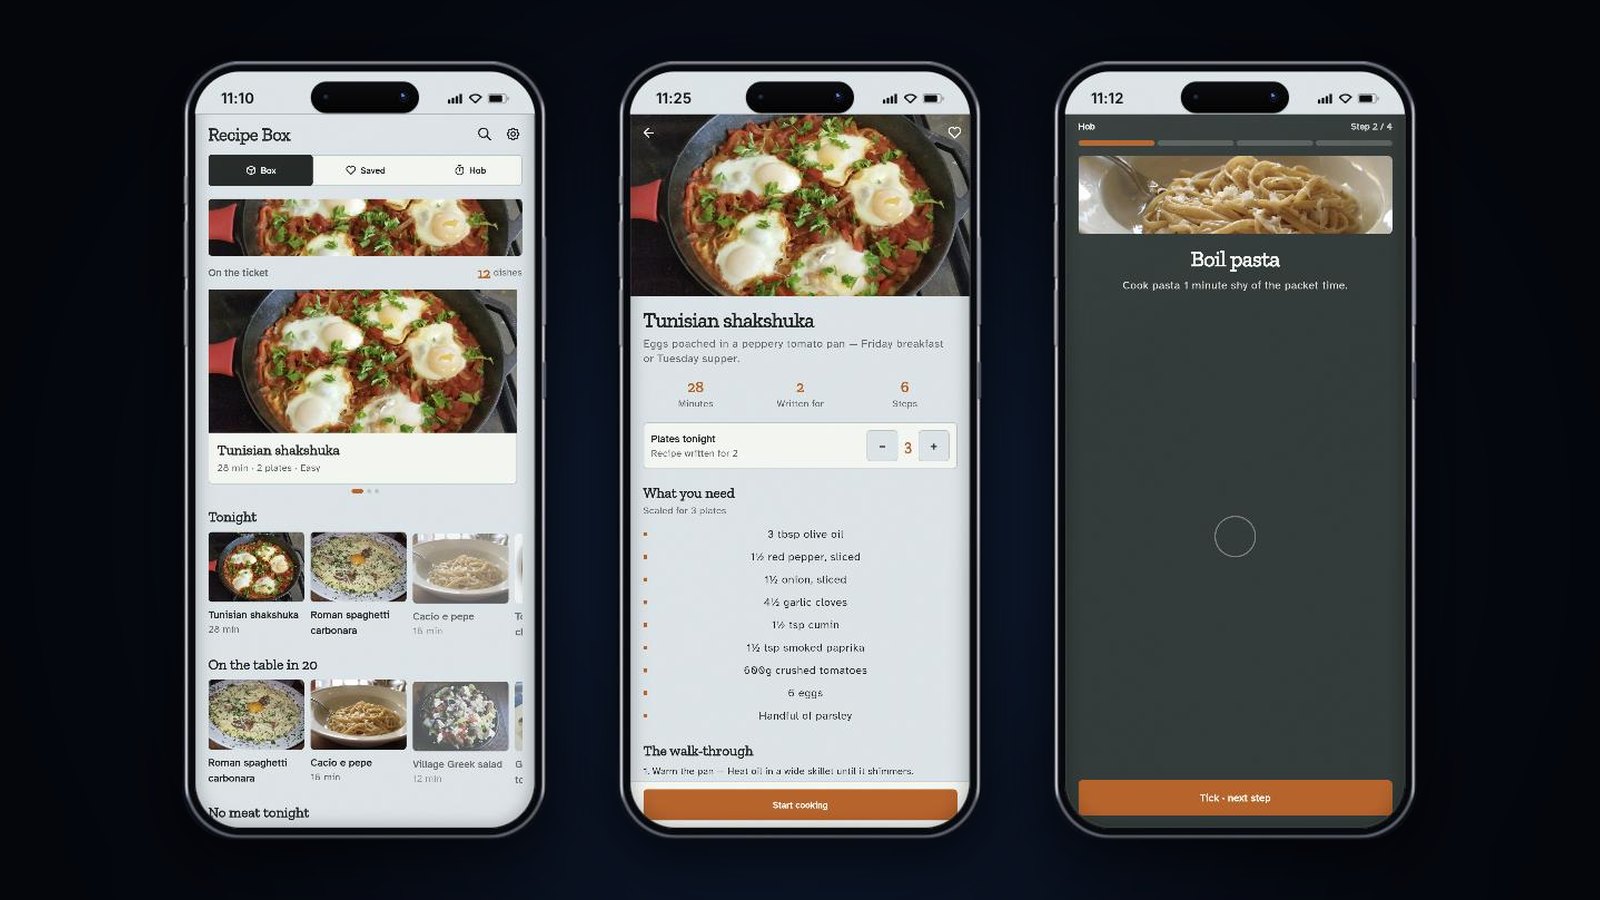
What you will build: the home screen, a recipe page with a plates stepper, and cooking mode.
Before you start#
- A FlutterGo account with a confirmed email address. See Creating your account & signing in, and Plans, credits & billing for credits.
- One sentence about your app. Name the screens and features you want.
- About 10 to 15 minutes. You can leave the tab open while the agent works.
Build it step by step#
Step 1: Describe your app#
- Open fluttergo.ai and sign in.
- In the prompt box, describe your app in one sentence. Name the screens and features you want.
- Keep Mobile app selected and click Start building.
Example from the video: "Recipe Box: a recipe app with search, favorites and a step-by-step cooking mode."
Step 2: Choose where data lives#
FlutterGo asks Where should data live?
- Supabase adds sign-in and a real database from day one.
- Skip for now builds the screens first. You can link a backend later.
Pick one and click Open workspace. FlutterGo prepares the live preview.
Tip: Not sure? Choose Skip for now. See Backends when you are ready.
Step 3: Watch the agent build#
The workspace opens with your chat on the left and the phone preview on the right.
- The agent reads your idea and writes a short plan.
- It picks a design direction: a color palette and fonts.
- The progress line ticks through Plan, Design, Screens and Preview while files are written.
A first app takes about 10 minutes. Open Show code, at the bottom of the right panel, any time to read the Dart.
Step 4: Let it check its own code#
Before the preview, FlutterGo checks the code with flutter analyze. If it finds errors, the agent fixes them on its own. In the video it found five errors and fixed them in about a minute. You do not need to do anything.
Step 5: Run the preview#
The preview builds by itself when the agent is done, and your app opens in the phone frame. To build it again later, press the round button at the top of the right panel (Run app, or Rebuild once the app has run). The first build can take a minute or two.
Step 6: Try your app#
Tap through the preview like a real phone. In Recipe Box:
- A short welcome chat asks how much time you have. Tap an answer, then Open the tin.
- Tap search and type pasta, then open a dish.
- Tap the heart to save it to favorites.
- Click Start cooking. Cooking mode shows one step at a time, and the progress bar fills as you tick each step.
Done. You now have a real Flutter app that runs on Android and iOS. You can share it from Ship → Share. On the Pro plan and up you can also download the code or push it to GitHub.
Step 7: Ask for a change#
Treat the first version as a draft. Type one change in plain words and send it.
- The agent explains what it will do and edits the code.
- When it is done, FlutterGo checks the code and rebuilds the preview by itself. You can also press the round button in the right panel to rebuild it.
- Check the change. In the video, each recipe page gets a Plates tonight stepper, and every amount scales when you tap +.
More ideas to try:
- "Add a shopping list tab."
- "Let me save my own recipes."
One change per message usually works best. On Pro and up, push a version you like to GitHub from Ship → GitHub: nothing is pushed automatically.
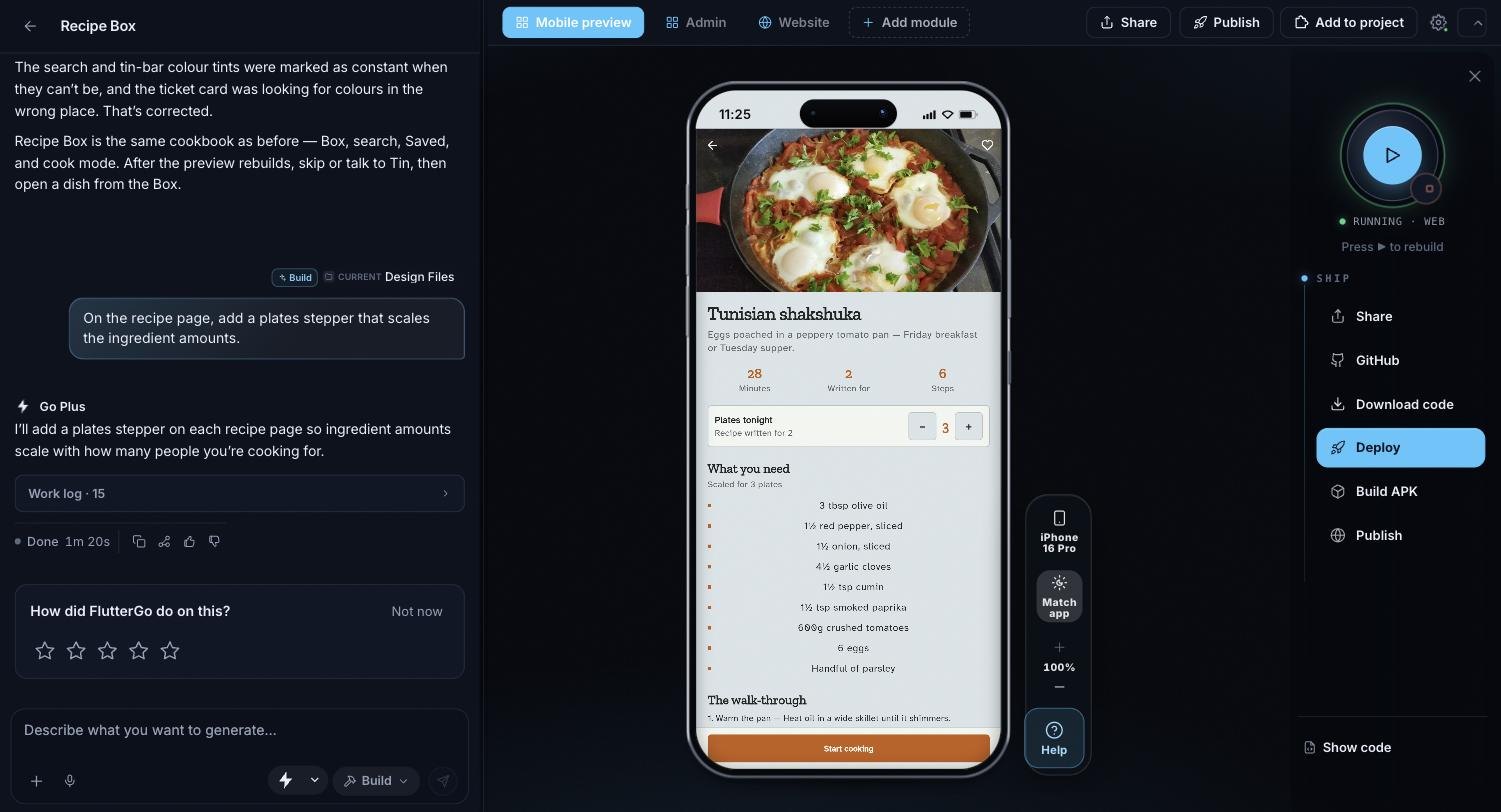
The workspace after the change: your chat on the left, the app in the phone preview, and Share, GitHub, Download code, Deploy, Build APK and Publish under Ship in the right panel.
FAQ#
What should I type in the FlutterGo prompt box? One sentence about your app that names the screens and features you want, for example: Recipe Box, a recipe app with search, favorites and a step-by-step cooking mode.
Do I need a backend for my first app? No. Choose Skip for now to build the screens first. You can link Supabase later for sign-in and a real database.
How long does it take to build a first app? A first app takes about 10 minutes. The preview builds by itself when the agent is done.
What if the code has errors? FlutterGo checks the code before the preview. If it finds errors, the agent fixes them on its own.
How do I change my app after the first build? Type one change in plain words and send it. When the agent is done, FlutterGo checks the code and rebuilds the preview by itself. On the Pro plan and up, push a version you like to GitHub: nothing is pushed automatically.